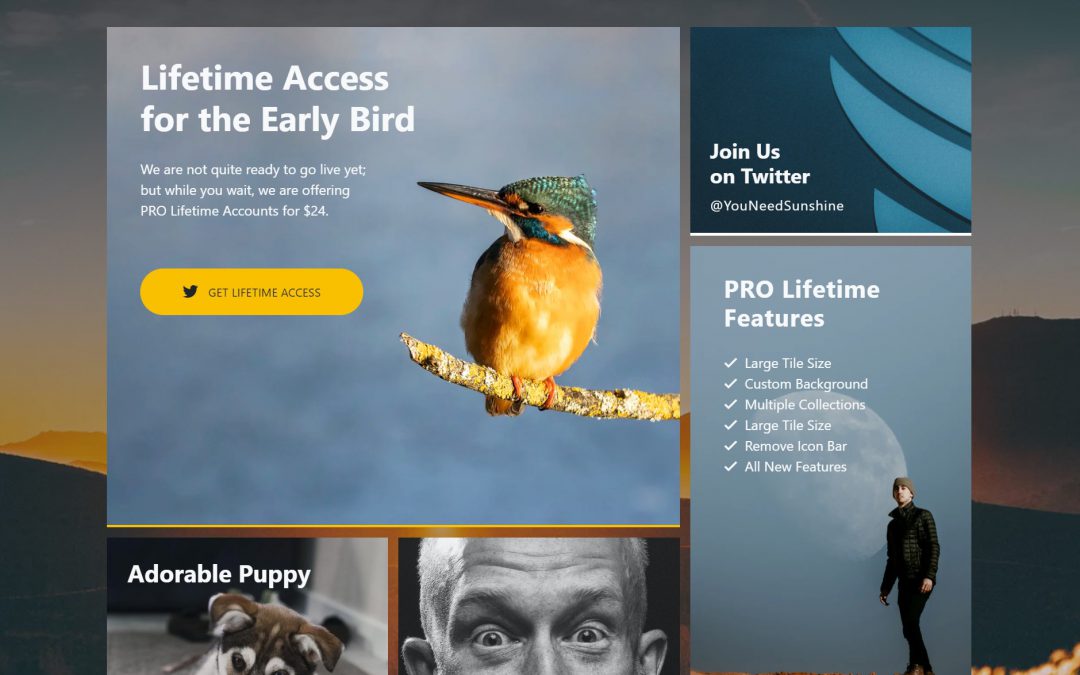
Sunshine Social: Early Bird Lifetime Access
We acquired Sunshine.Social back in August of 2019. Since then we added some minor upgrades to the site and then ultimately shut the site down for several reasons. Today we are working to bring it back better than ever!
Background
When we acquired Sunshine Social, it was a simple social network in which you only saw posts by those who you followed and you only saw one post at a time. You then had to decide what kind of action to take on each post (like it, comment on it or just skip it), the idea was to reduce the constant noise you find on other networks like Twitter.
In theory this is a pretty interesting idea, but after exploring the site deeper and discussing the future of the platform. It was clear this concept wasn’t going to work very well, the interactions would become very tedious if you follow a lot of people, plus, who wants yet another social network? We decided to step back from it for nearly a year, debating how and if it was worth it to move forward.
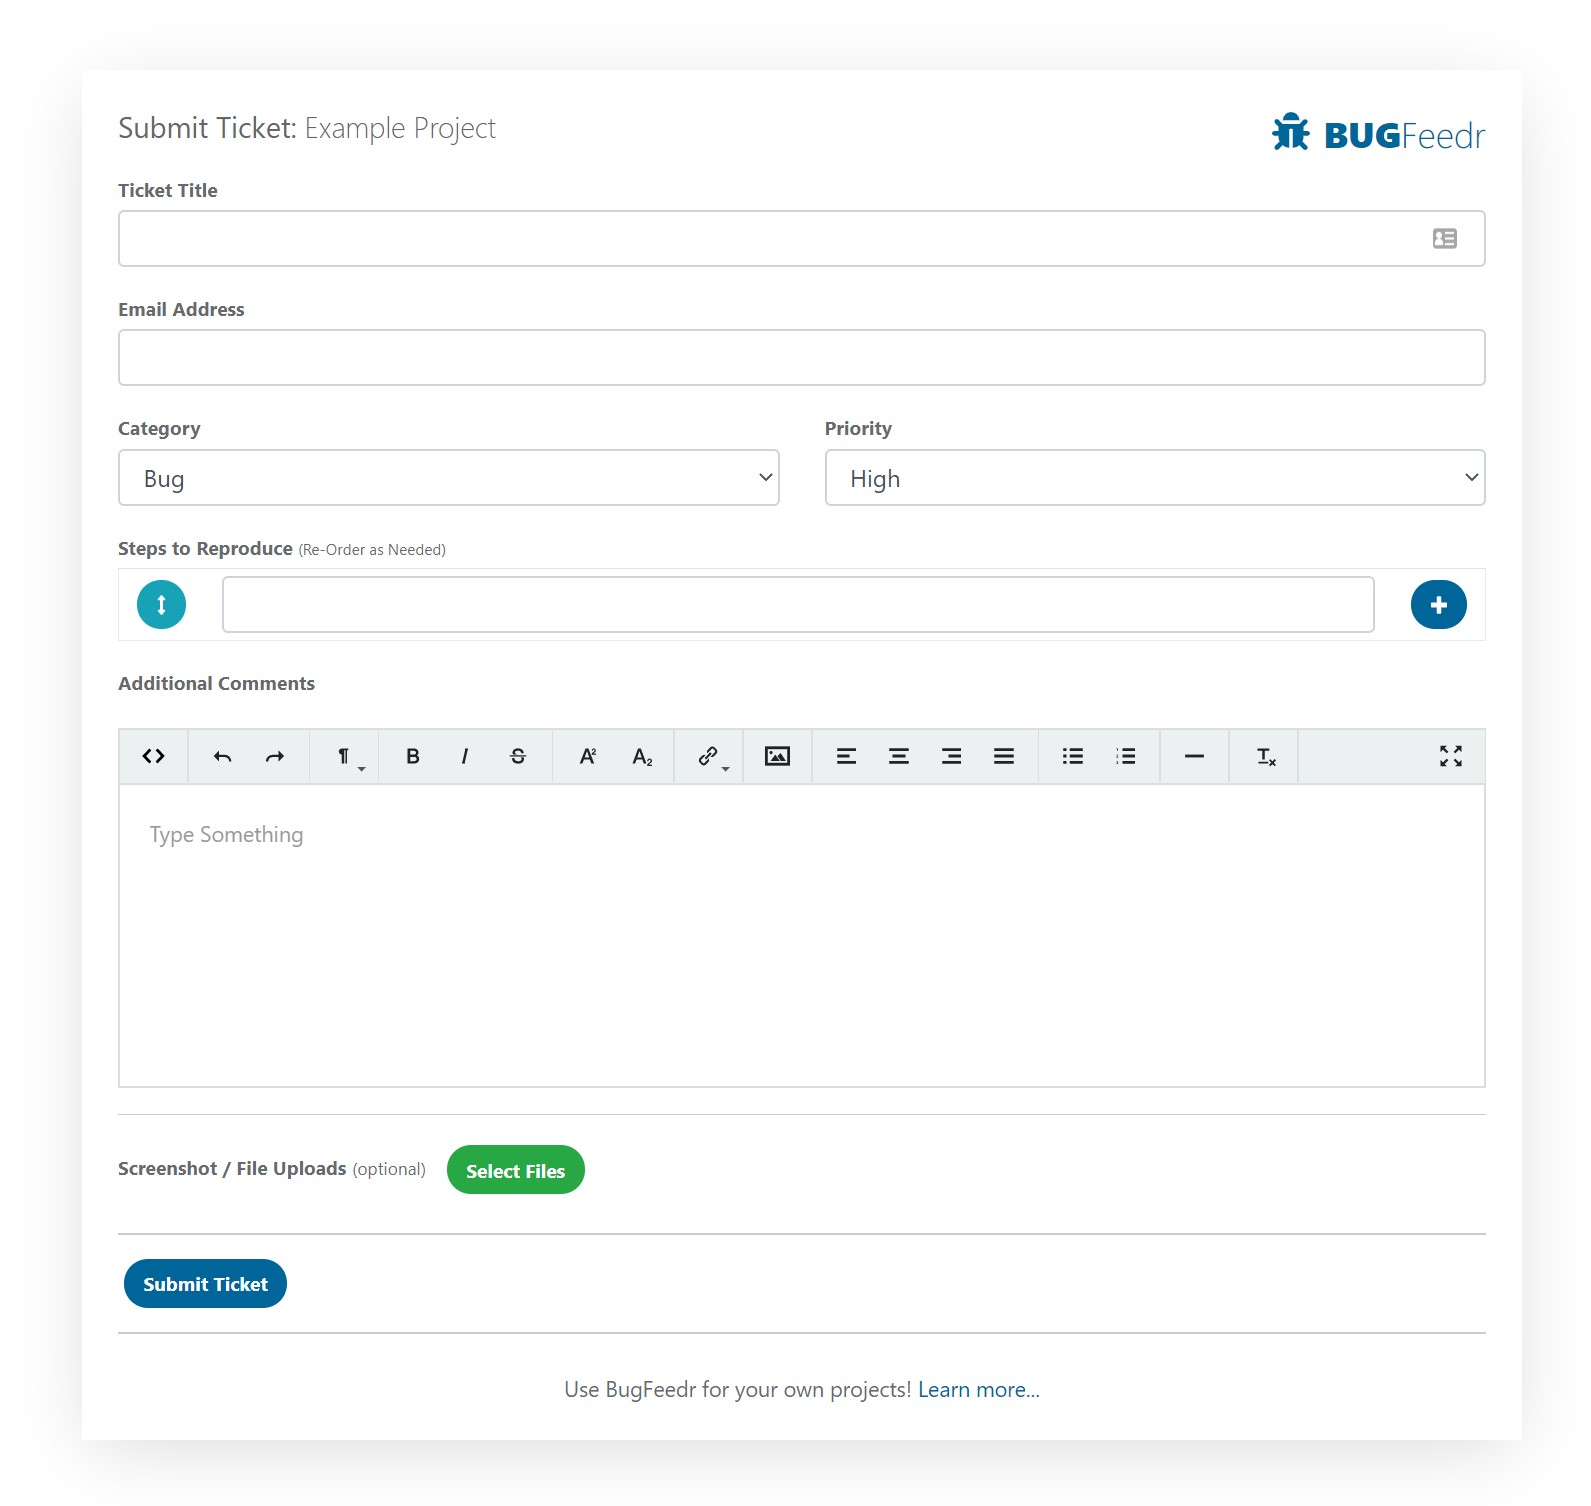
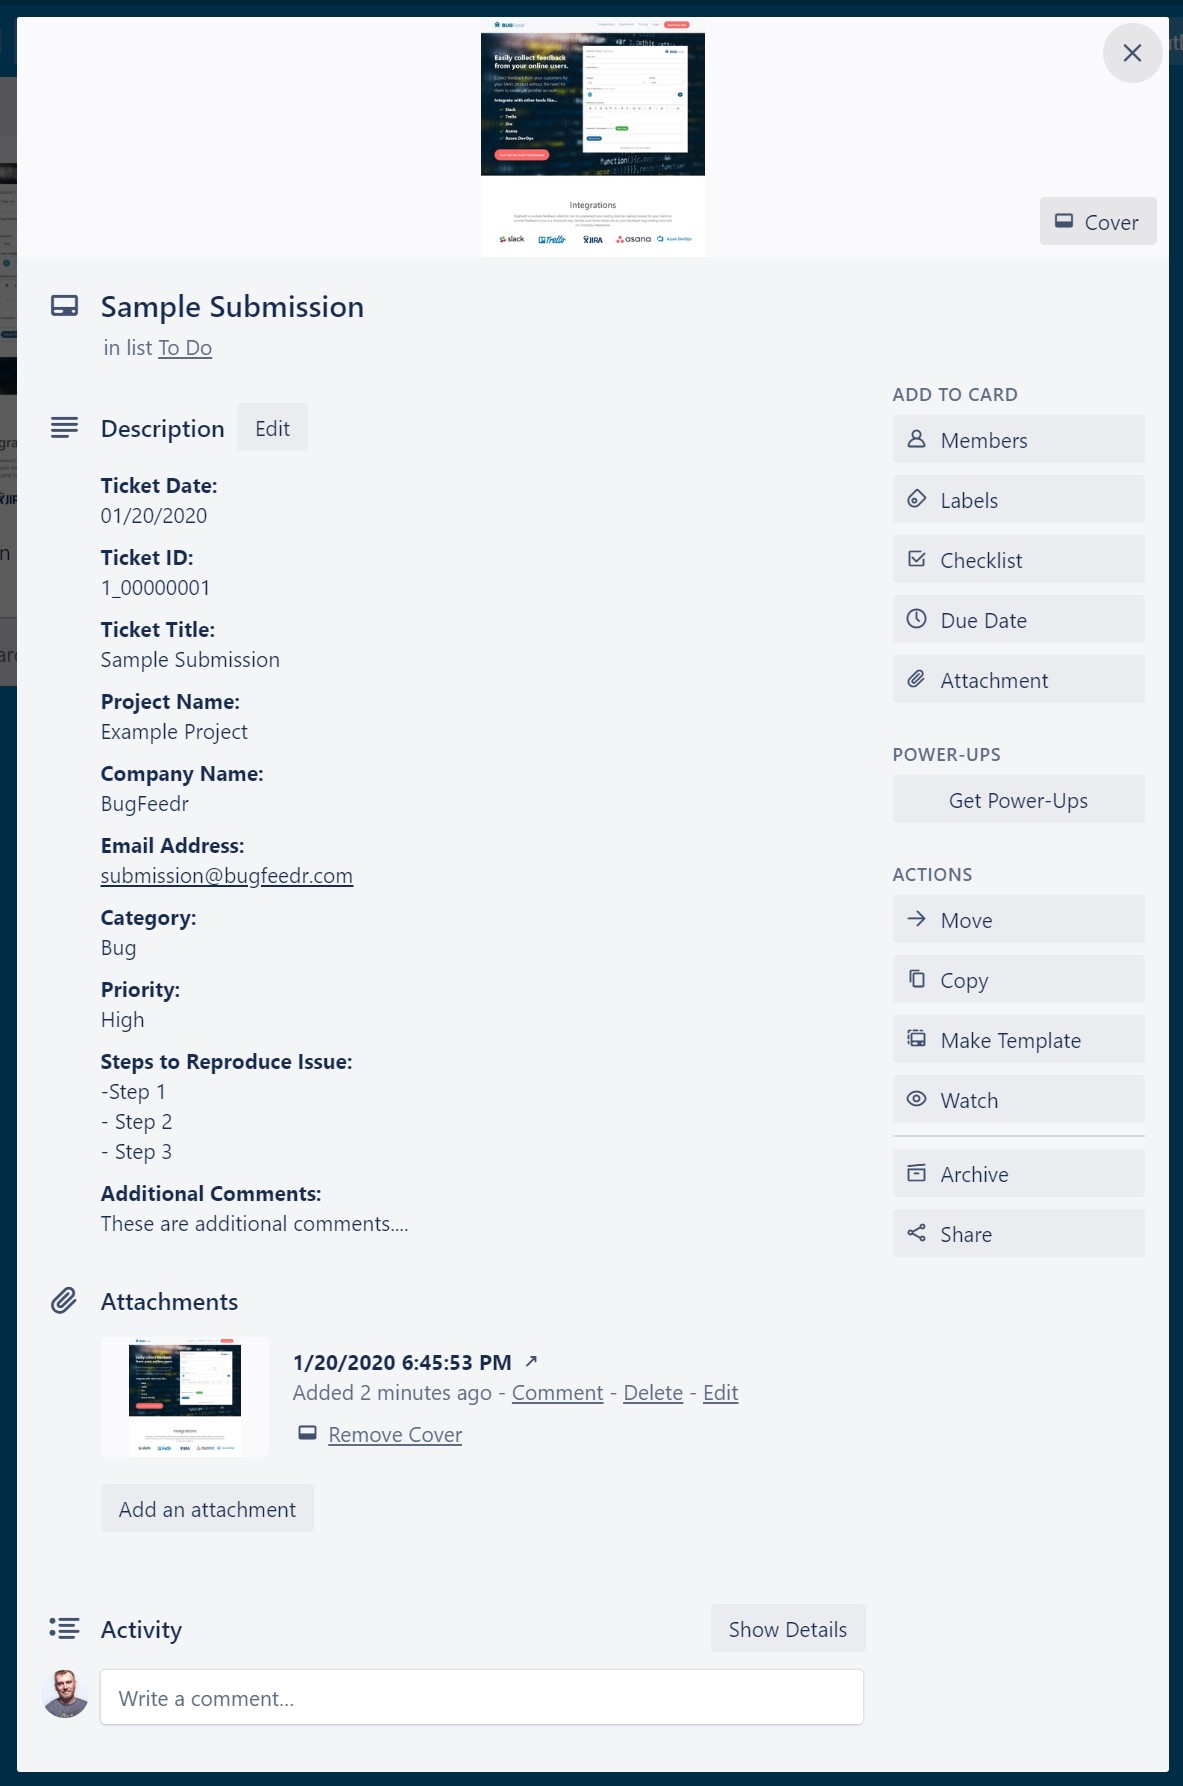
This is basically what the site looked like before we stopped pushing out updates…

A New Beginning
After many months, lots of ideas and no progress; we finally decided to make a new service, from the ground up but it needed to be fairly simple and quick to build.
Sunshine Social is going to be a place for you to organize all of your social media, websites, blog posts and other links into a centralized location. This will allow you to share just one link, or link to one comprehensive page from your various social media profile settings so people can easily discover and follow or connect with you across all your social profiles and services.
As an example, here at Krazier.com we build lots of different SAAS products which means we have lots of links to share and keep track of. To give you some perspective here are some stats for you, we have…
- Twitter Accounts: 21
- Instagram Accounts: 14
- Facebook Pages: 25
- LinkedIn Pages: 8
- Websites: 50+
To be fair, we are not necessarily super active on all these accounts but we use a lot of them. If you have looked at the homepage of krazier.com, it sort of acts like our “central” location for a bunch of our services. It works but it could be better and more interesting, and that is the purpose of Sunshine Social.

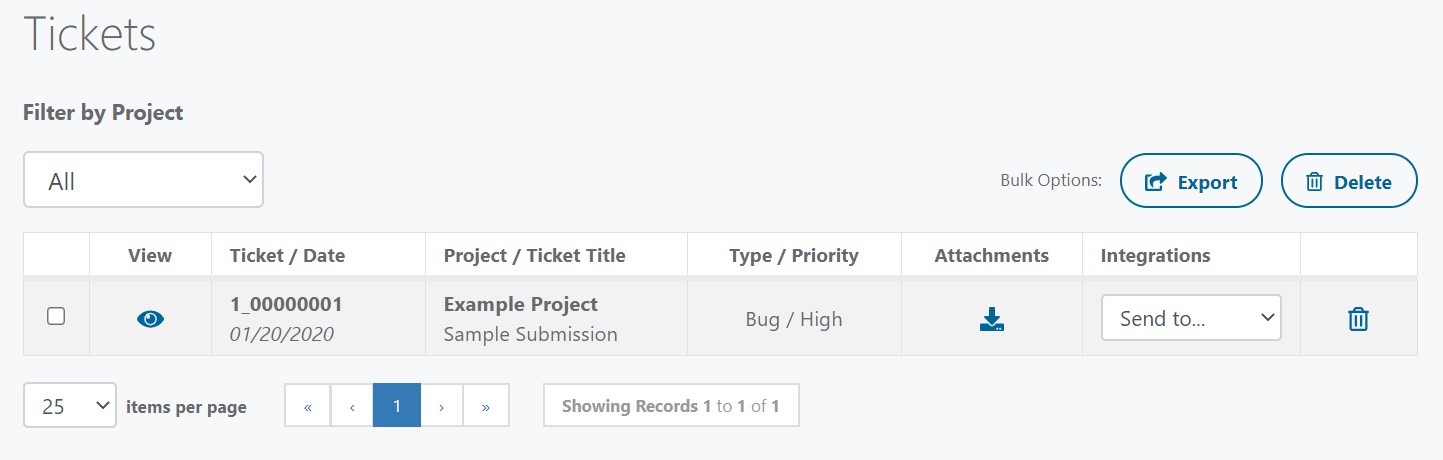
Phase One
We are actually still building out the full site at the moment, but just recently launched a new landing page for early pre-registrations.
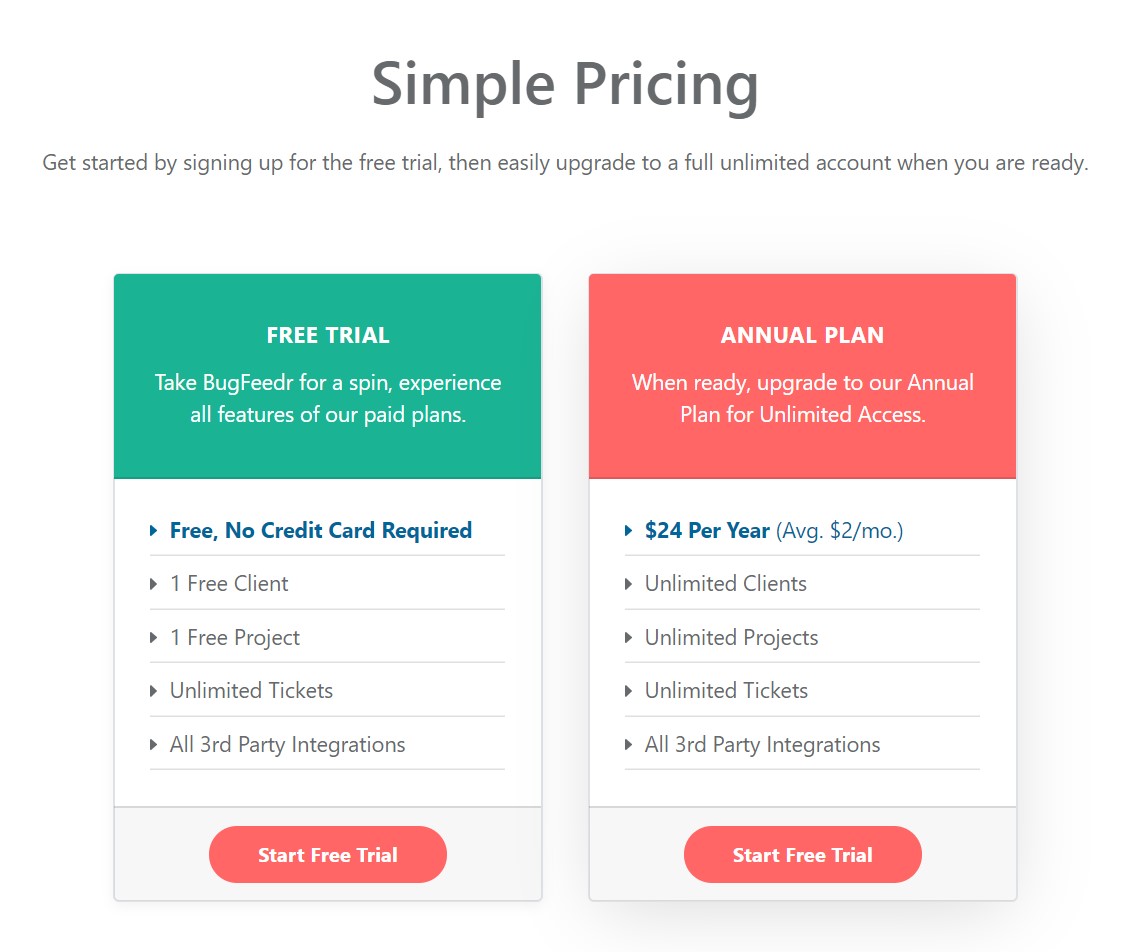
The full service will likely cost between $6 & $8 per month once we go live, with an annual option as well (I think). With that said, our “Early Bird Lifetime Access” is priced at only $24, for lifetime access!. If this service looks useful to you, it will be well worth spending the money now on the early bird special.
Not only do you get a great price, you will also receive some additional features…
- Larger Tile Size
- Custom Profile Background
- Multiple Collections
- Remove Footer Icon Bar
- All Future Features
We’ll be continually adding new features, but want to start with the basics first and grow from there. So that list above will continue to grow and you won’t have to pay to get the new features.
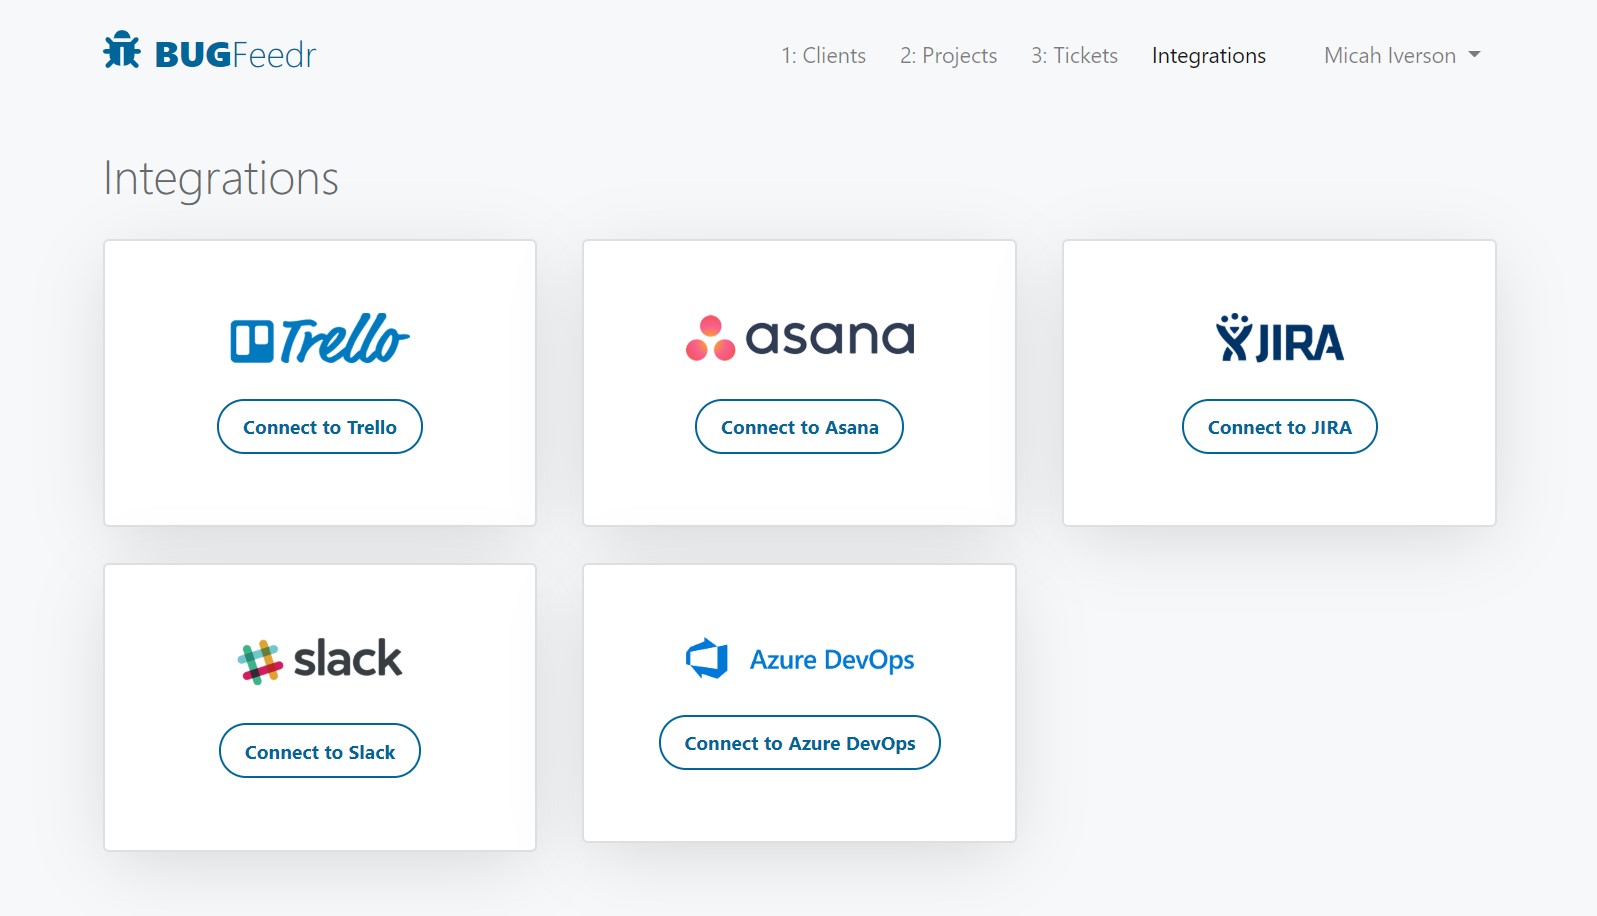
We are not quite ready to show off the main UI and UX for the app, but here are some screenshots of some areas we are working on at the moment…
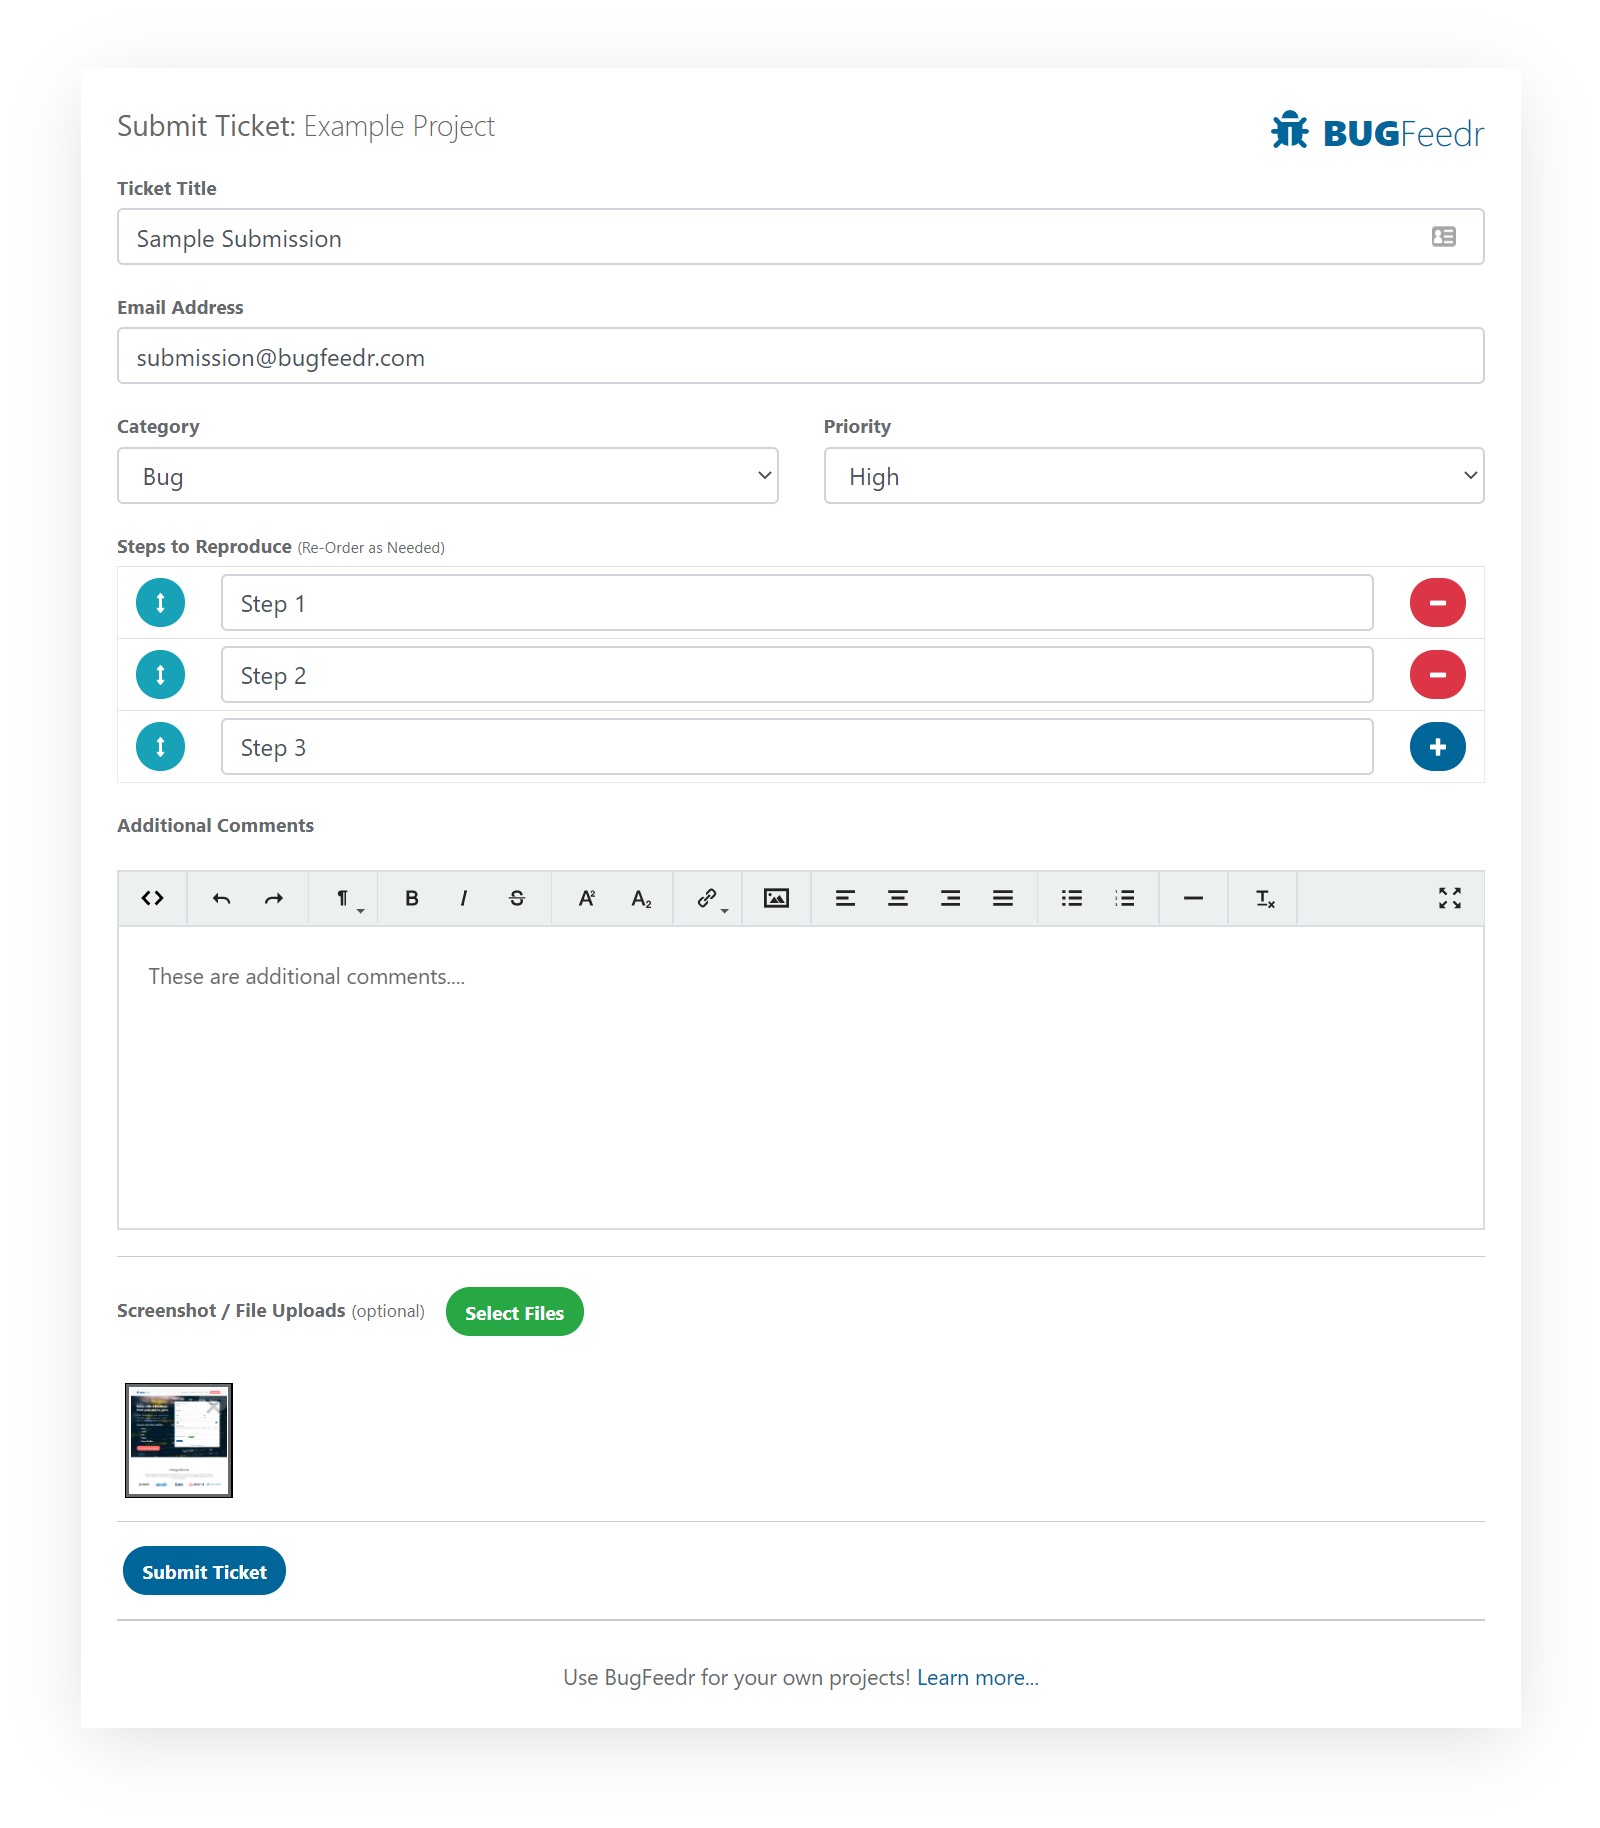
This first image is part of our onboarding process, we all have a lot of social accounts that often have the same or similar usernames. This screen will allow you to very rapidly add all those usernames in on some of the more popular social networks…

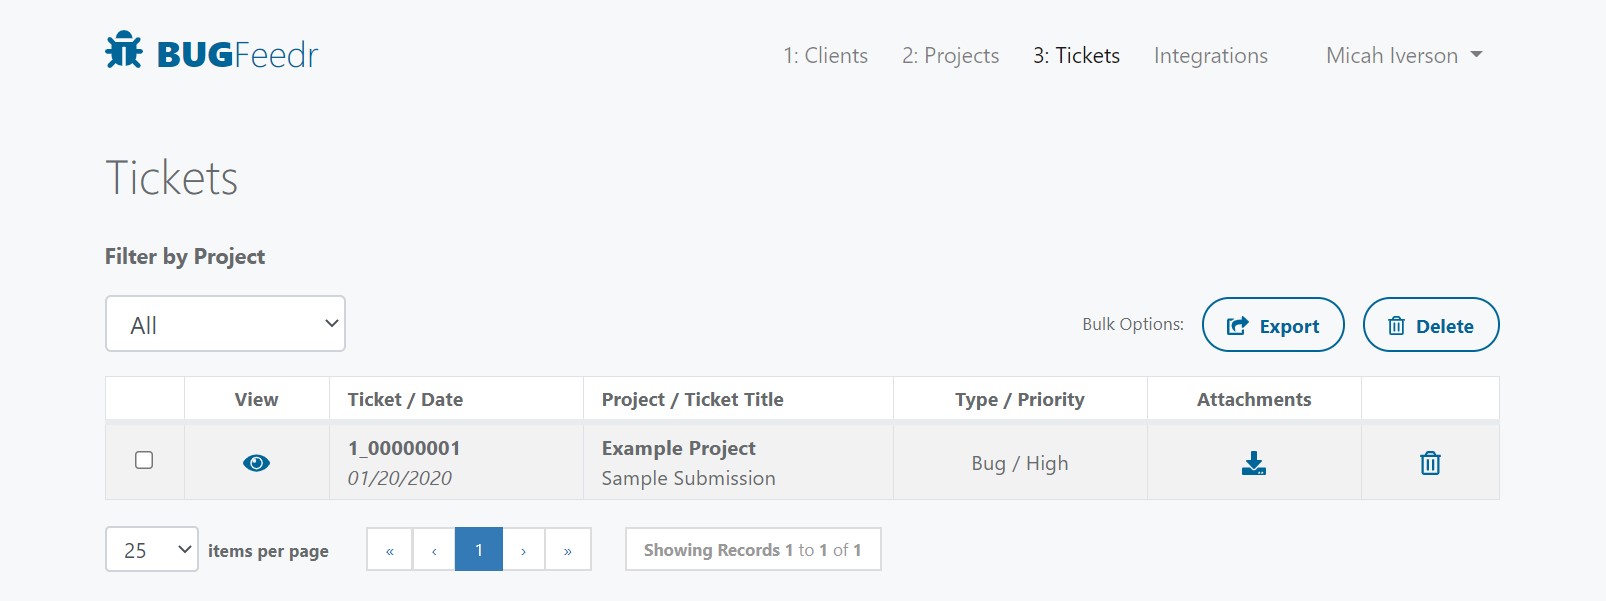
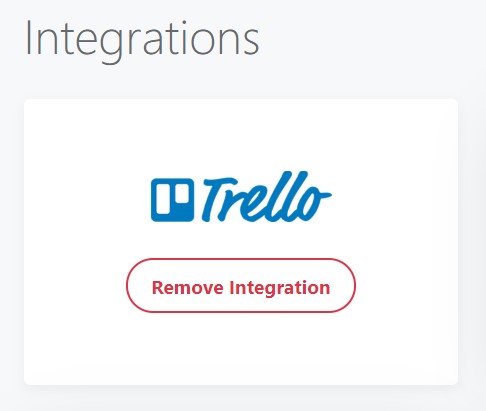
This next image is similar to the one above, but is intended for more fine tuned additions of what we call “Flares”. We will have 30+ different services and options you can add to your profile page when we launch.

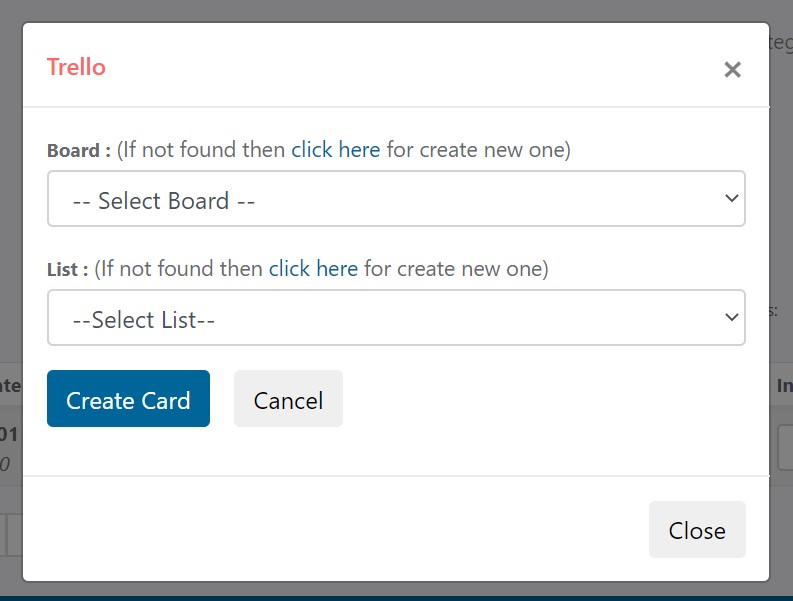
This final image roughly shows how the add/edit Flare screen will look like, this will of course change based on the type of Flare you are adding, the goal is to keep it as simple and easy to use as possible.

Collections
As I mentioned above, we have lots of SAAS projects, companies and social accounts. It doesn’t really make sense to group all these links into one big section on a page. It really makes sense to be able to break them up into different sections or as we call them “Collections”.
Pro accounts will be able to add as many collections as they wish, with as many links within each one as they choose as well. Here are some examples of how we are using collections, you’ll be able to name each collection how you see fit…
“Personal”
This is where I keep all my personal profiles, like my personal Twitter profile, my Facebook page, my LinkedIn page, my website, etc. Basically anything that relates to me personally, not one of my businesses.
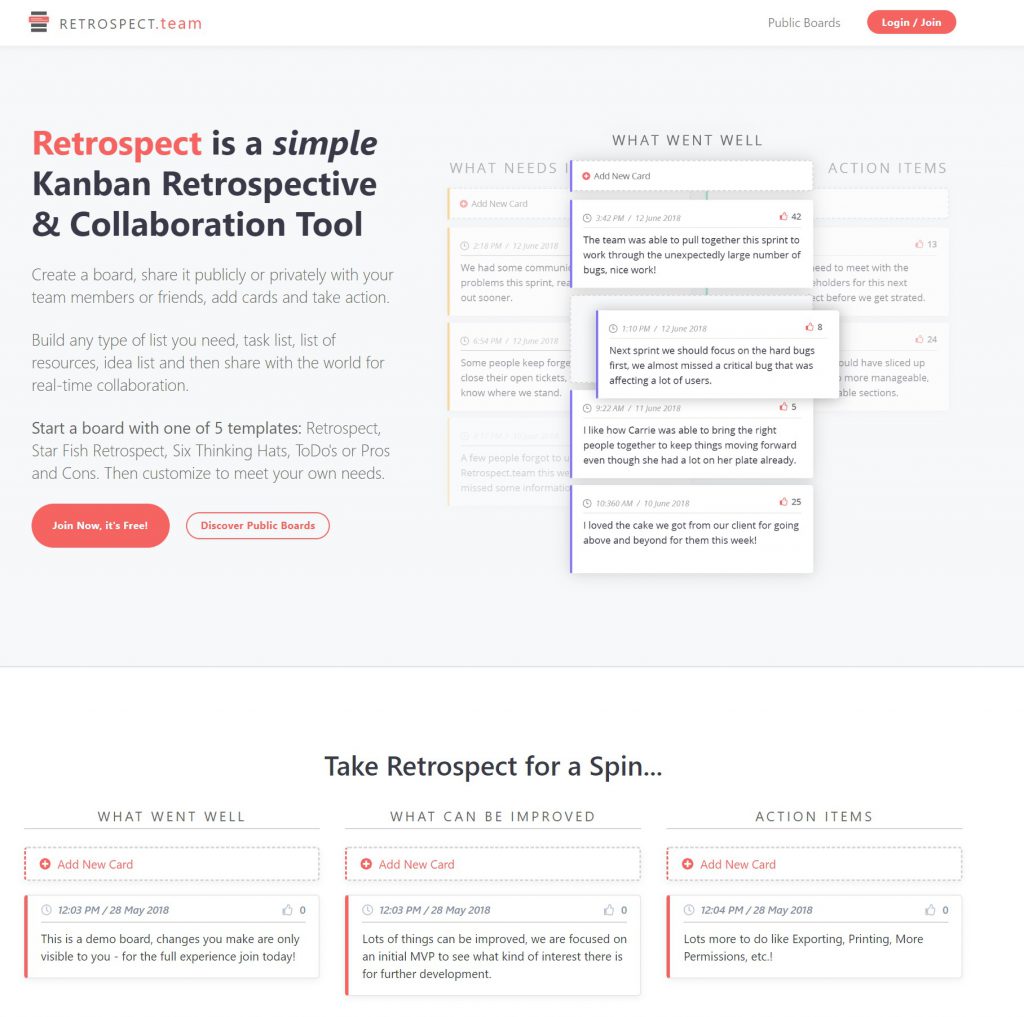
“Retrospect.team“
This is where I would add links for our Retrospect Team website.
“Home Pro Partners“
Again, this is where we would add links for that website.
“Wild Fox Painting“
I also own and run a house painting company, so I would add relevant links to that service in this collection.
And so on and so forth. Sunshine Social will be great for people like us (Indie Makers) who have lots of accounts, services and websites.
Phase Two
When we go live with the actual new site, this will be our Phase 2. We’ll have more to discuss, more to show and you’ll be able to start creating your Sunshine Social profile. For now, get your Pro Lifetime Access!


Recent Comments